Create or Edit In WordPress Dashboard
- 1
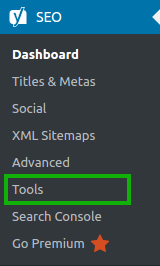
- Log in to your WordPress website. When you’re logged in, you will be in your ‘Dashboard’. On the left-hand side, you will see a menu. In that menu, click on ‘SEO’.
- 2
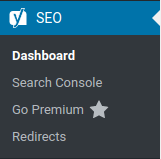
- The ‘SEO’ settings will expand providing you additional options. If you don’t see the ‘Tools’ setting in your ‘SEO’ menu, please enable your advanced settings first.
- 3
- Click on ‘Tools’.

- 4
- Click on ‘File Editor’.
This menu will not appear if your WordPress install has disabled file editing. Please enable file editing or edit the file through FTP.
- 5
- Make the changes to your
robots.txtfile. If you do not have arobots.txtfile, click the button to create it. - 6
- Save your changes.
Create or Edit On Your Server
WordPress generates a virtual robots.txt file if the site root does not contain a physical file. To override the virtual file, please follow these steps to create a physical robots.txt file.
- 1
- Use your favorite text editor and create a text file.
- 2
- Save the empty file with the name
robots.txt. - 3
- Upload the file to your server root.
If WordPress was blocking access to the virtual file, you should be able to edit the physical file from our plugin. If not, you can always edit the robots.txt directly on your server using FTP or a server file manager.
Please contact your webhost for assistance if you have trouble uploading or editing files on your server.


